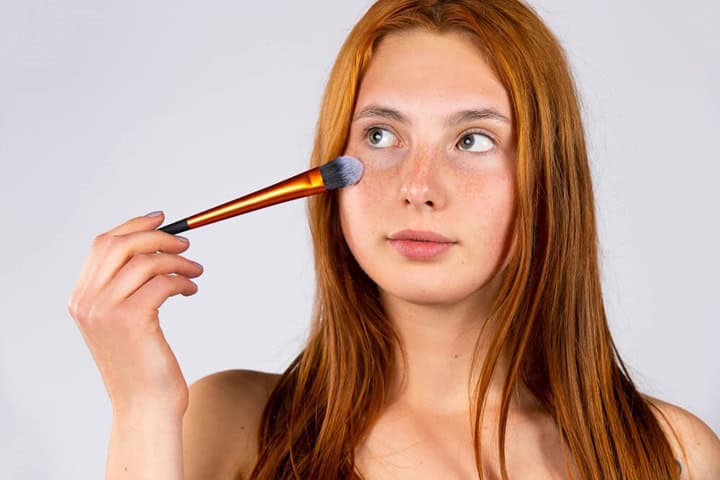
How To Cover Spots With Makeup: Pores, Red Spots, And More
7th December, 2024
When an uninvited spot appears, it demands quick action and discreet coverage. Here, you can easily master how to cover spots with makeup with effective crafting tips.
No one likes it when spots appear spontaneously on their face, but its not without its reasons. Perhaps it is because you haven’t washed your face properly, or unnecessary substances have integrated their way into your pores. Either way, it is important to care for these spots properly with intuitive care. In this article, we will explain how to cover spots with makeup, for both amateur and professional purposes. From selecting the right products to detailed step-by-step application techniques, we explore how to cover everything from red, angry spots to prominent pores and post-spot marks, ensuring your skin looks its best.
Key points:
- Discover the best professional makeup products to cover different types of spots.
- Learn how to apply makeup to reduce the visibility of redness and blemishes.
- Understand which ingredients to avoid to prevent further breakouts.
- Tips on maintaining your makeup over the course of a busy day.
- Advice on removing makeup to keep skin clear and healthy.
Choosing the Right Makeup to Cover Spots

When it comes to mastering how to cover spots with makeup, preparation is as crucial as the application.
Before reaching for your professional makeup bag, ensure your skin is primed and ready. A clean, moisturised face creates the perfect canvas for spot coverage.
Start by cleansing with a gentle face wash to remove dirt and oils, followed by a light moisturiser that won’t clog pores. This basic prep can help prevent further breakouts and makes your makeup application smoother and more effective.
To effectively hide spots, opt for non-comedogenic makeup to avoid blocking pores further. The essential items in your makeup kit should include:
- Primer: A good primer can smooth out the skin’s appearance and help makeup adhere better throughout the day. Look for labels that say “oil-free,” “cruelty-free,” or “for acne-prone skin.”
- Concealer: A high-coverage concealer can camouflage spots without needing heavy application. For red or angry spots, green-tinted concealers can help neutralise redness before applying your skin-tone concealer.
- Foundation: Choose a formula that offers buildable coverage so you can control how much you apply and where. Liquid foundations with a matte finish tend to work well for oily skin types.
- Setting Powder: To ensure your makeup stays in place, lightly dust setting powder over the concealer and foundation. This step is important for those long days when you need your cover-up to last.
Avoiding Harmful Ingredients
It’s essential to avoid certain ingredients that can exacerbate spot formation. Be wary of:
- Silicones: Often found in primers and some foundations, silicones can clog pores despite their smoothing effects.
- Heavy Oils: Ingredients like coconut oil or lanolin can intensify breakouts by further clogging pores.
- Talc: This common filler in powders can dry out sensitive skin and cause irritation.
Explore Our Exclusive Makeup Collection
Click below to explore our curated collection and start your journey to a more glamorous you today!
Find Professional MakeupStep-by-Step Guide to Covering Spots with Makeup

When figuring out how to cover spots with makeup, it’s crucial to adapt your approach to the type of spot you’re dealing with. If you’re covering a new, red, or angry spot, you’ll need different techniques compared to concealing scabbed-over spots or prominent pores. Here’s how to seamlessly integrate concealer and foundation to achieve a flawless finish.
Concealing Red and Angry Spots
Dealing with a fiery blemish that’s just emerged? Follow these steps to calm and cover:
- Step 1: Begin with a soothing serum foundation as your base to lightly cover and reduce initial redness. For oily skin, makeup brushes can provide more precise application, avoiding further irritation with your fingers.
- Step 2: Use a dense, pigment-packed concealer. Warm it between your fingertips for easier application, then pat (don’t rub) it directly onto the spot. Use a brush to blend the edges, which helps integrate the concealer into your foundation without highlighting the blemish.
- Step 3: Throughout the day, you might need a touch-up. Always use clean tools to apply concealer to avoid spreading bacteria, which can exacerbate the spot.
How to Hide Prominent Pores
Oily skin and prominent pores often accompany each other, complicating spot coverage:
- Step 1: Start with a light moisturiser to balance skin hydration, followed by a soft matte foundation to create a smooth, even base.
- Step 2: Apply a product like a pore filler to minimise the appearance of pores. Warm the product between your fingers before patting it into place, which helps to mattify and smooth the skin’s texture.
Covering Scabbed Spots
Scabbed spots require gentle handling to avoid highlighting dry, flaky skin:
- Step 1: Prep the area by removing dead skin cells gently with a muslin cloth, then hydrate with a lightweight moisturiser to make the skin more pliable and less flaky.
- Step 2: Apply a hydrating base with a tapping motion. Rubbing can disturb the delicate skin and make the scab more noticeable.
- Step 3: If necessary, apply a thin layer of concealer for additional coverage. Remember, less is often more with scabbed spots; too much product can draw attention rather than camouflage.
How to Cover Post-Spot Marks
Dealing with the aftermath of a breakout can be as challenging as the breakout itself. Hyperpigmentation marks are common, but they can be managed effectively with the right makeup techniques.
- Start with a serum foundation to even out your skin tone. Options like Trinny London BFF All Day for a matte finish or BFF De-Stress for a glow can lay a perfect base for further coverage.
- Use a lightweight concealer applied in thin layers. This technique allows for gradual build-up without the heaviness. A brush can help with precision, ensuring you only cover the areas that need it and maintain a natural look.
- For persistent dark marks, incorporate a colour corrector before applying concealer. Peach tones work well for olive to darker skin tones, while pink is suitable for lighter complexions. This step helps neutralise the darkness, making it easier to blend the overall makeup.
Should You Cover Spots With Makeup?
The decision to cover spots with makeup comes with considerations. While makeup can effectively hide blemishes and post-spot marks, it can also potentially exacerbate underlying skin issues.
- Skin Health Priority: Always prioritise skincare over makeup. Effective skin care can reduce the need for heavy makeup, which might aggravate skin problems.
- Gentle Application: When applying makeup, the less you touch your face, the better. Excessive touching can spread bacteria and irritate the skin, leading to more prominent blemishes.
- Tool Hygiene: Regularly wash brushes and applicators used for concealing spots. This prevents the spread of bacteria from spots back to your makeup products or other areas of your face.
Common Mistakes to Avoid When Covering Spots

Achieving a flawless finish when covering spots with makeup can be challenging. Here are some common pitfalls to avoid, ensuring your makeup improves rather than detracts from your natural beauty.
Overapplication
One of the biggest mistakes is applying too much product. Layering heavy makeup can actually highlight the blemishes you’re trying to conceal rather than hide them. Instead, focus on applying thin, buildable layers of concealer and foundation. This method allows for more controlled coverage and a more natural appearance.
- Tip: Use a light hand and add layers only where necessary. This approach helps maintain the skin’s natural texture without the “caked on” look.
Choosing the Wrong Shade
Selecting the correct shade of concealer will impact the performance of the coverage. A mismatched shade can draw more attention to the spot instead of camouflaging it.
- Tip: Always match the concealer with your skin tone for blemishes. For under-eye coverage, one shade lighter can help brighten dark areas, but spots require precision matching to blend seamlessly with your overall skin tone.
Skipping Skincare
Proper skincare before makeup application will always make the biggest difference. Prepping your skin with the right products can reduce the visibility of blemishes and improve the efficacy of your makeup.
- Tip: Before applying makeup, use a gentle exfoliant and a non-comedogenic moisturiser. Ingredients like beta-hydroxy acids (BHA) and niacinamide help clear pores and reduce redness, making the makeup application smoother and more effective.
Popping Spots Before Adding Makeup
While it can be tempting to pop a spot before covering it, this can worsen inflammation and make the spot more difficult to cover.
- Tip: If you must pop a spot, do it cleanly and allow the skin to heal overnight. Apply a spot treatment with salicylic acid to reduce swelling and redness before going to bed.
How to Remove Makeup Effectively
Removing makeup properly is as imperative as applying it, especially for acne-prone skin. Here’s how to ensure your skin remains clear:
- Choose the Right Cleanser: Opt for a face wash that contains enzymes or acids. These ingredients provide chemical exfoliation, which is effective at clearing out pores thoroughly.
- Double Cleansing: To thoroughly remove makeup, oil, and dirt, practice double cleansing. This method involves washing your face twice, which helps eliminate any residual makeup debris that a single wash might miss.
- Maintain Washcloth Hygiene: Use a fresh washcloth each time you wash your face. Reusing washcloths can spread bacteria, as they can harbour microbes after they dry. Keeping a stack of clean washcloths handy ensures you always have a fresh one to use.
Use Makeup To Cover Spots
In conclusion, this is everything that you need to know about how to cover spots with makeup on your face. Throughout this guide, we’ve covered essential techniques on how to cover spots with makeup, from selecting the right products to applying them for a natural look. We also explored common mistakes to avoid during application and the importance of removing makeup effectively to prevent acne flare-ups. By following these tips, you can improve your skin’s appearance while keeping it healthy and clear.
Further reading:
Want to learn more about skin and body care and how this can be applied for both everyday scenarios as well as on the stage? Try these guides:
- Can you tan through makeup – an insightful article for sunbed enthusiasts.
- How to hide varicose veins on legs – keep your legs looking spotless and hide those veins away, with or without makeup and clothes.
FAQs
How can I use colour correctors to cover spots?
What should I avoid when covering spots with makeup?
What should I do if my concealer doesn’t fully cover a spot?
Sources
Sissons, B., (2024) What to know about hyperpigmentation. Medical News Today. [online] Available at: https://www.medicalnewstoday.com/articles/323808 [accessed 07/11/2024]
Cherney, K., (2023) AHA vs. BHA: What’s the Difference? Healthline. [online] Available at: https://www.healthline.com/health/aha-vs-bha [accessed 07/11/2024]
Sachdev, P., (2024) Slideshow: Acne Visual Dictionary. WebMD. [online] Available at: https://www.webmd.com/skin-problems-and-treatments/acne/ss/slideshow-acne-dictionary [accessed 07/11/2024]
Hey there! I’m Isabelle Kerrington, and I’m thrilled to share my passion for the performing arts through my blog. Focusing on theatre makeup, my posts will cover everything from product recommendations to helpful tips and engaging tutorials. Join me on this exciting journey as we explore the magical world of theatre makeup together.